If you recently deleted some course materials and still received a message that your course quota is almost finished or if you want to make sure that deleted items are permanently deleted from the course and no longer consume any course space, please follow the below steps:
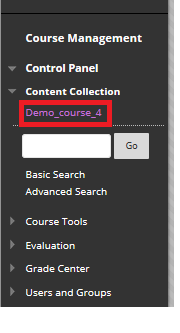
- From your Course Management menu click on Content Collection and then click on your course ID.
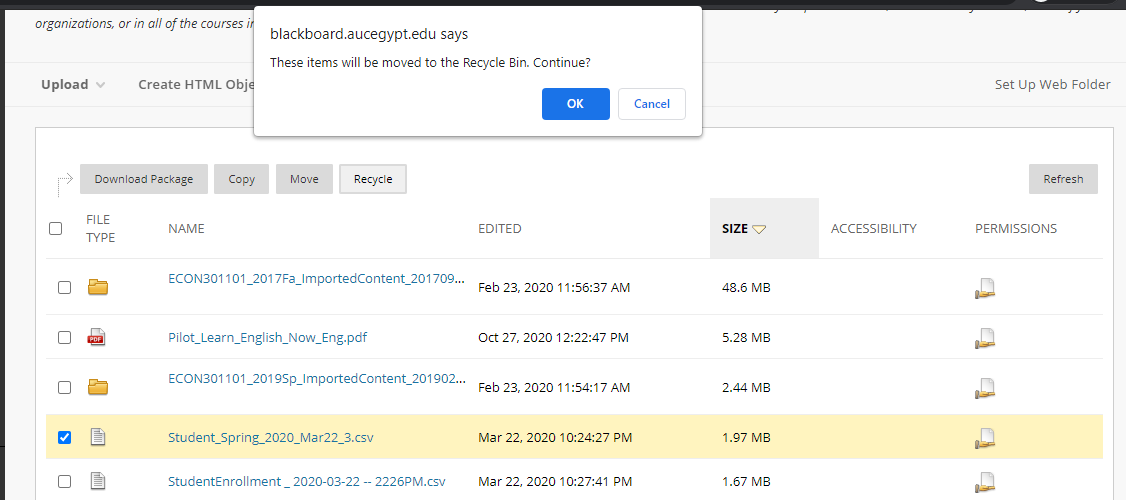
2. A list of all the files and folders of the course will appear. You can click on “Size” to sort by folder/content size ascending or descending.

3. Choose the items you wish to delete by ticking the box next to the item’s name and choose Recycle from the top of the page.
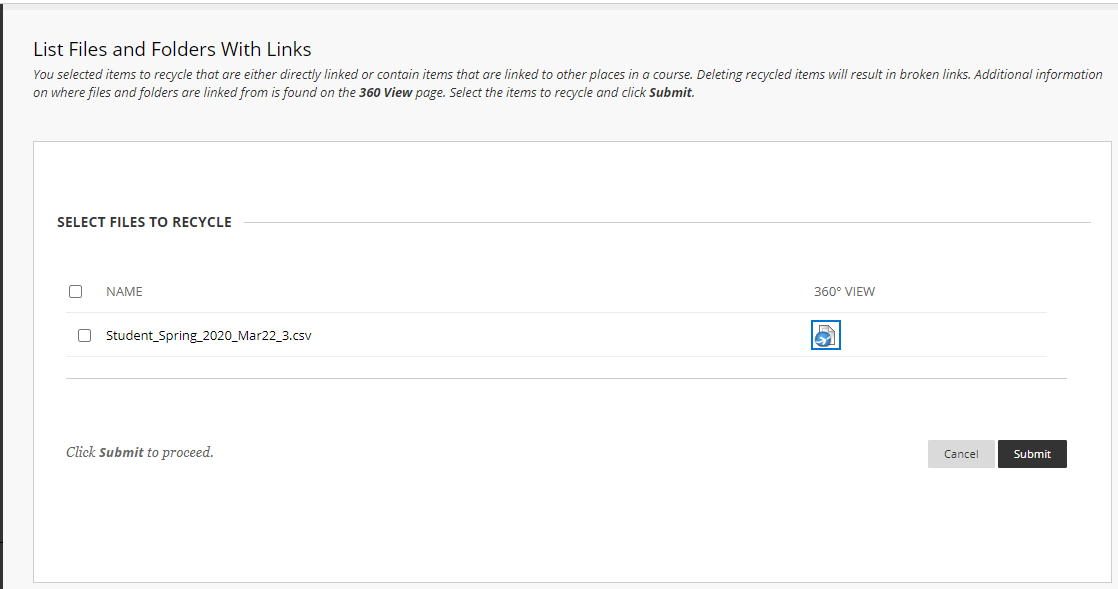
4. A confirmation message will appear. Double check you are deleting the correct file/folder and click OK then Submit
5. Click on the Recycle folder, you will be able to see the content moved to recycle. Note that it is still counted in your course quota. To remove it form the quota, you need to delete it from Recycle as well.
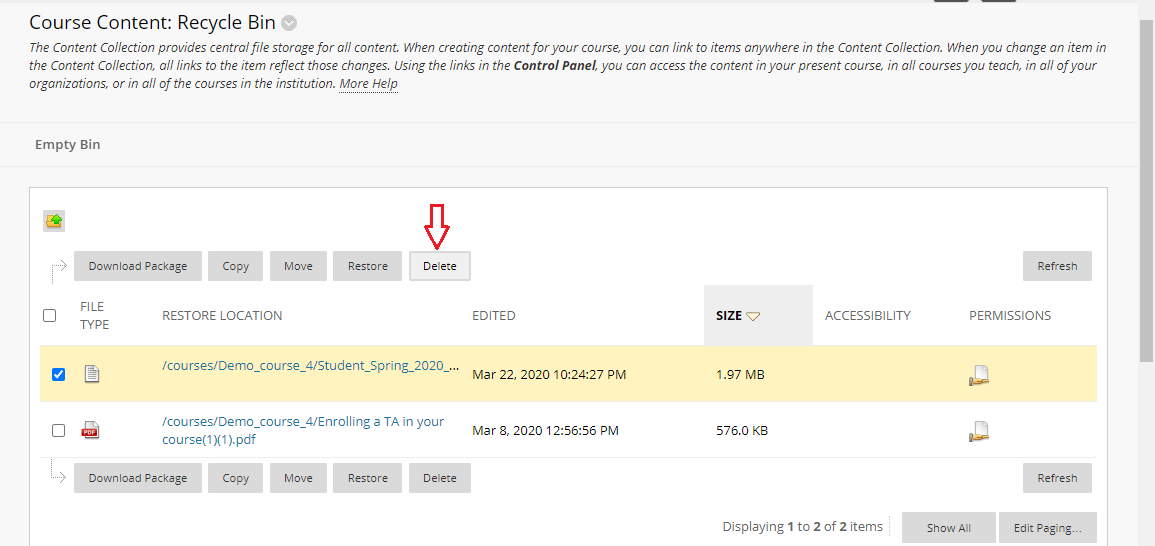
6. Confirm deletion to remove the content from your course permanently.